Note: To port an existing fax number, you must have available fax numbers on your plan. If you receive an “Oops! You have no fax numbers remaining” message, please update your plan to purchase additional fax numbers before proceeding.
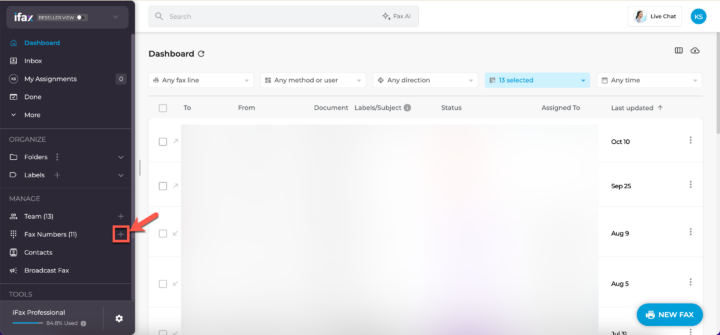
- Login to iFax and go to your Dashboard.
- On the navigation bar beside the Fax Numbers title, click the + icon.
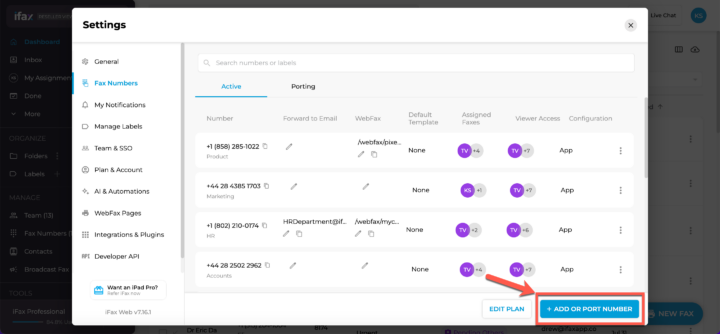
- Alternatively, click on Fax Numbers in the navigation bar from your Dashboard. This will open Settings > Fax Numbers. Click the + Add or Port Number button.
- Alternatively, click on Fax Numbers in the navigation bar from your Dashboard. This will open Settings > Fax Numbers. Click the + Add or Port Number button.
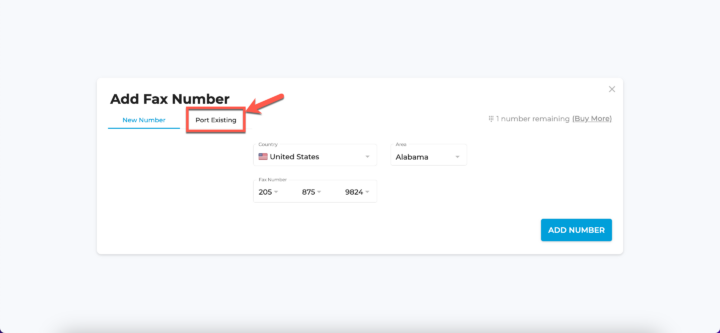
- Click on the Port Existing tab.
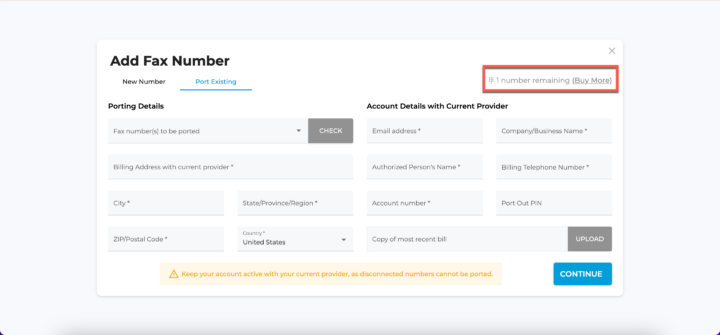
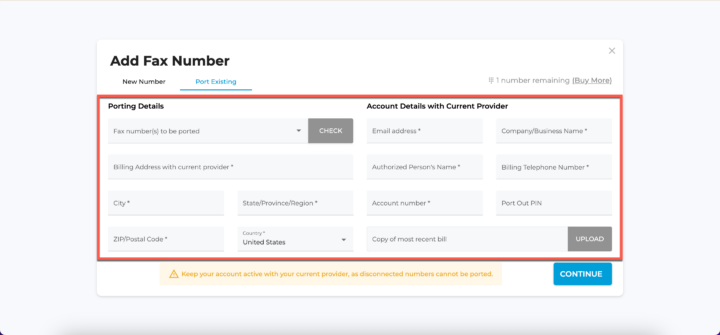
- In this window, you will see your allowance for additional fax numbers. Proceed with providing the porting details.
- Fill in the following information to port your existing fax number:
- Fax Number(s) to be ported
- Verify if the fax number is valid by clicking on the Check button.
- Billing Address with Current Provider
- City
- State/Province/Region
- ZIP/Postal Code
- Country
- Fax Number(s) to be ported
- Then, provide the Account Details with Current Provider:
- Email Address associated with the account
- Company/Business Name
- Authorized Person’s Name
- Billing Telephone Number
- Account Number
- Port Out PIN (if applicable)
- Copy of the Most Recent Bill: Upload a file for verification.
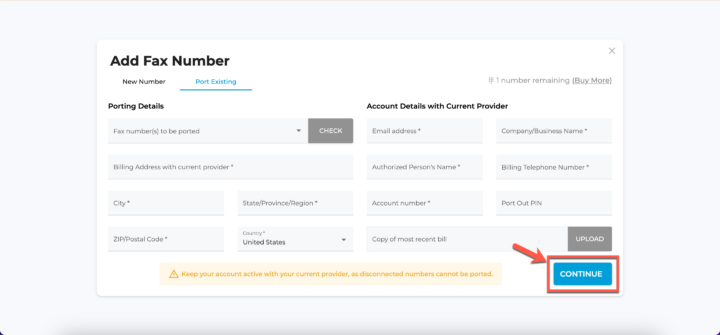
- Once all the information is filled in, you can proceed with the porting process by clicking on Continue.
Porting from your current provider takes 7-10 business days. During this time, you’ll still receive faxes through your current provider. Once approved, an FOC (Firm Order Commitment) date will be provided and shown in Fax number settings. After this date, you’ll receive faxes in iFax using your existing number.
If you have any questions or need further assistance, please feel free to reach out. We’re here to help! Thanks for choosing iFax. ❤️


